How to connect your inverter to WIFI
HOW TO CONNECT YOUR DEYE INVERTER TO WIFI (Step-by-Step Instructions)
Your OFFGRID NOW® power cabinet should be connected to the internet to monitor the system’s performance. If the system is not connected to the internet, there is no historical log of how the system is performing, and this can make trouble-shooting difficult. If you are wanting to monitor your system from a computer or smart device, you will need to ensure there is an adequate internet connection.
STEP-BY-STEP INSTRUCTIONS
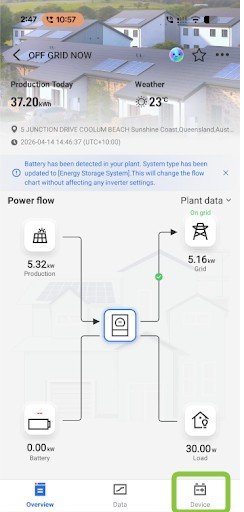
1. Log into the DEYE Cloud App.
On the bottom of the home screen, you will see 3 menu options. Select the menu option on the far right, “Device” as marked by the green marker in the image.
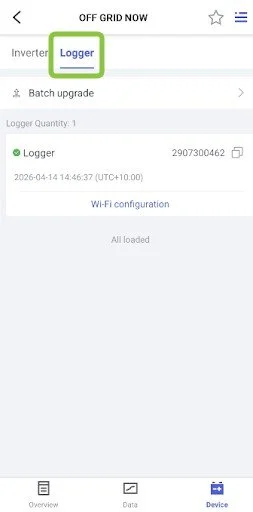
2. Select “Logger”.
On the “Device” screen you should see 2 tabs: “Inverter” and “Logger”. Select the tab, “Logger” as marked by the green marker in the image.
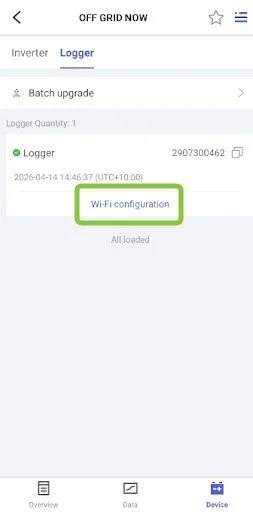
3. Select “Wi-Fi configuration”.
On the “Logger” screen, look for the “Wi-Fi configuration” link in blue. Select the link, “Wi-Fi configuration” as marked by the green marker in the image.
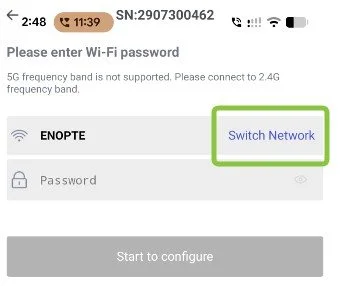
4. Select “Switch Network”.
On the next screen, you should see an existing network displayed as “ENOPTE” or “OGN”. This is our network that we connected your system to for set-up and testing. To connect the system to your local WIFI, select the blue link labelled “Switch Network” as marked by the green marker in the image.
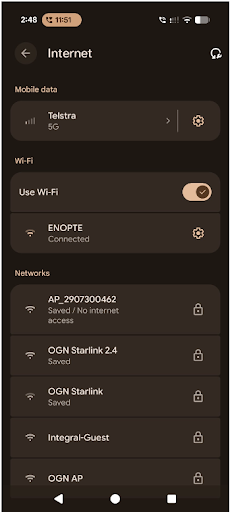
5. Select your local WIFI Network.
It’s time to choose your WIFI connection. Choose the appropriate network from the list. If you have a WIFI connection that is split into 2.4 and 5GHz networks, be sure to connect to the 2.4GHz network.
Once you have selected your network, press back to return to the configuration screen.
If you have not done so already, you may need to split your WIFI connection into 2.4 and 5GHz networks. Click here for instructions to split Starlink networks. For all other routers consult your User Manual.
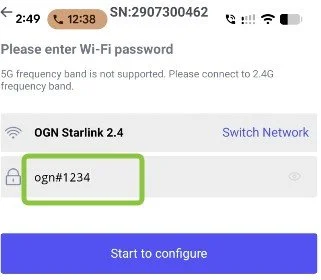
6. Enter password and press “Start to configure”.
Upon returning to the configuration screen you can enter you local WIFI password. To start the configuration process, select the blue button labelled “Start to configure” as marked by the green marker in the image.
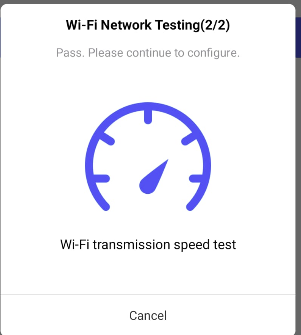
7. The “Wi-Fi Network Testing” screen.
The WIFI network test will now commence, checking the network and testing the transmission speed. Do not interrupt this process - you are almost done!
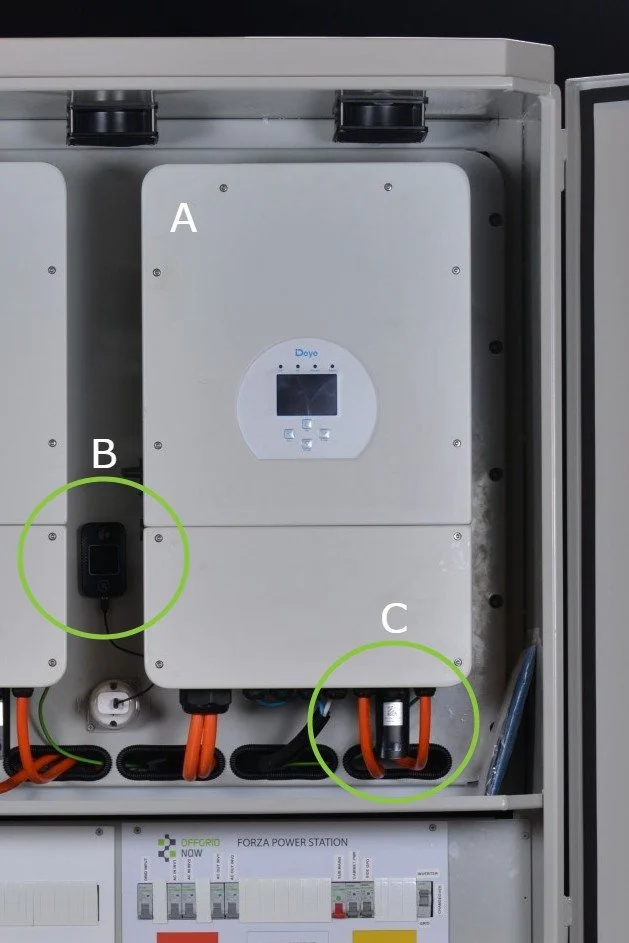
8. Locating the USB Data Logger.
After the WIFI network testing is complete it’s necessary to pair your phone with the USB Data Logger. The USB Data Logger is directly under the inverter as marked by the green marker “C” in the image (or attached with Velcro to the inside of your cabinet). If you do not have the password and serial number at this stage, you can locate it on a sticker on the body of the USB Data Logger itself.
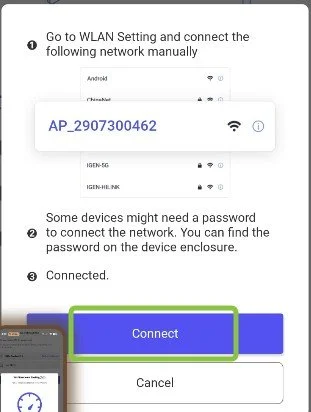
9. Pairing the USB Data Logger with your phone.
Select the USB Data Logger from the list. It’s easiest to look for the device in the list that matches the last 3 numbers of the Serial Number that you have written down. Once you have selected the USB Data Logger, enter the password and select the blue button labelled “Connect” as marked by the green marker in the image. Select “Yes” to the following screen regarding the device having no internet access as marked by the green marker in the second image.
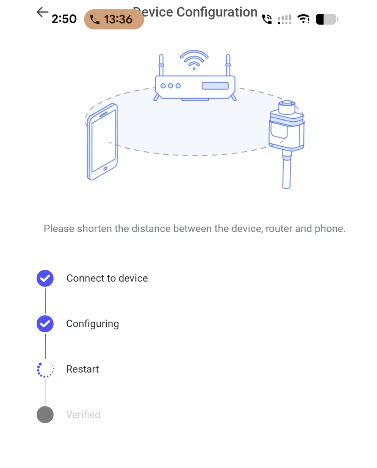
10. Final Device Configuration
The “Device Configuration” screen will appear and test the connection between your phone, the inverter and the data logger.
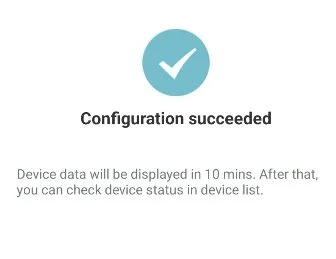
11. Configuration Successful
The “Configuration succeeded” screen will appear confirming a successful connection of the USB Data Logger.